
-
-
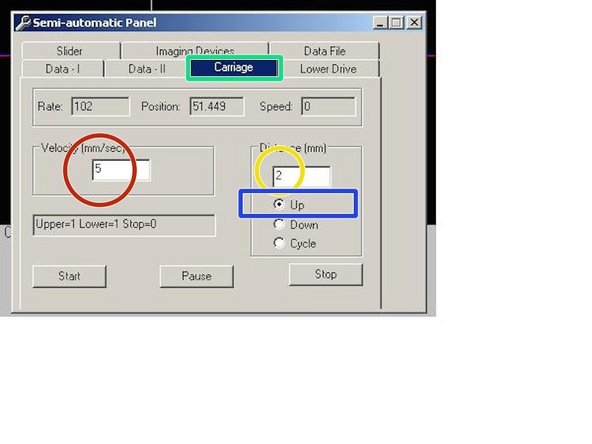
Select 'Carriage' tab. This tab controls the vertical translation.
-
'Velocity' determines the speed that the specimen holder moves at.
-
'Distance' determines the distance traveled every time the specimen holder moves
-
Once values for 'Velocity' and 'Distance' have been keyed in, press on 'Start' to move the specimen holder, i.e. each time it moves at 2mm and at speed of 5mm/s.
-
Be sure to tick the correct bullet, e.g. 'Up' for moving specimen holder upwards after end of experiment and 'Down' during preparation of experiment.
-


Almost done!
Finish Line