1. Follow steps as per Wear Tester -> Preparation of Specimen -> How to Prepare Specimen
    • Follow steps as per Wear Tester -> Preparation of Specimen -> How to Prepare Specimen

    • Obtain necessary readings before start of experiment such as:

    • 1. Weight of ball specimen

    • 2. Images of ball specimen, before and after cleaning

    • 3. Images of disc specimen after cleaning

  2. Turn on the 5 main power supply that connects to: Motor (MAC 800)
    • Turn on the 5 main power supply that connects to:

    • Motor (MAC 800)

    • NI cDAQ - 9174 USB Chassis

    • 5V PSU

    • 24V PSU

    • USB Hub

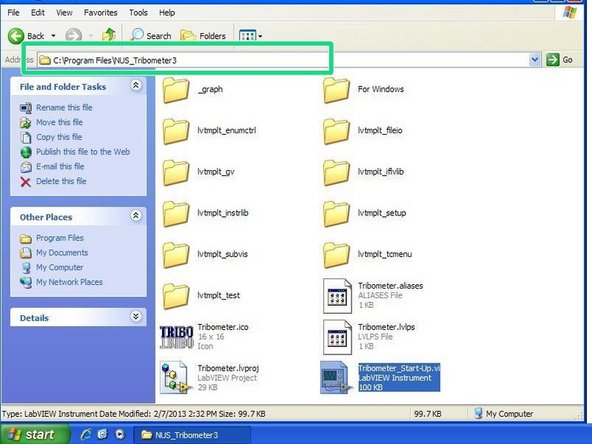
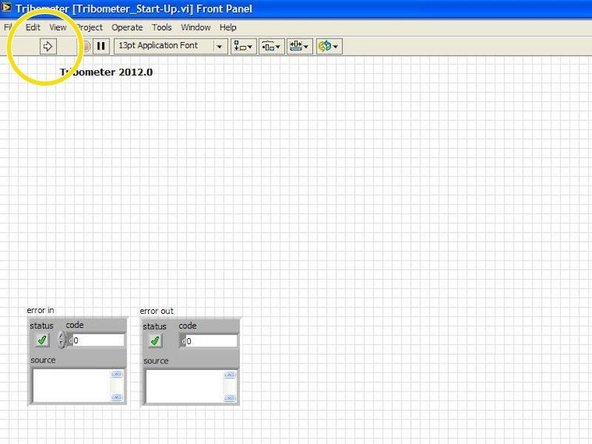
  3. Go to My Computer -> (C:) -> Program Files -> Tribometer_Start-Up.vi Click on the white arrow as shown to run the program
    • Go to My Computer -> (C:) -> Program Files -> Tribometer_Start-Up.vi

    • Click on the white arrow as shown to run the program

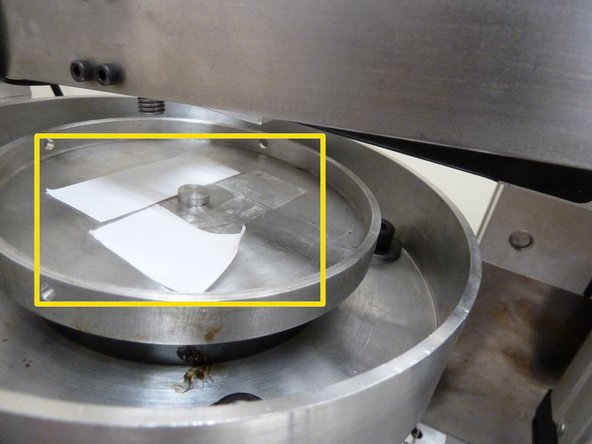
  4. Secure the disc specimen to the disc-holder with strong double sided tapes
    • Secure the disc specimen to the disc-holder with strong double sided tapes

    • If tool steel plate is used, secure plate to disc-holder with s3 allen key on M4 screws

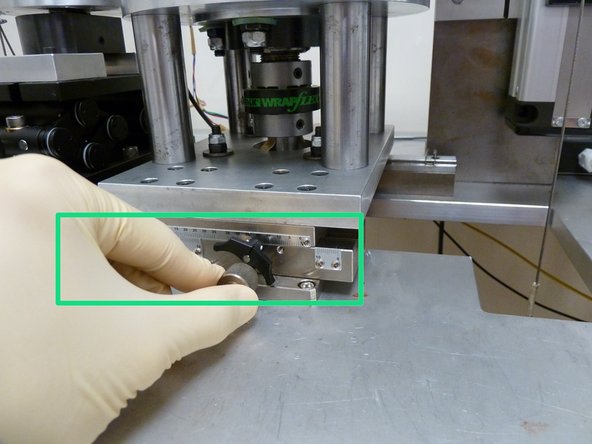
  5. Adjust X-translation stage to required displacement to ensure ball specimen runs only on disc specimen
    • Adjust X-translation stage to required displacement to ensure ball specimen runs only on disc specimen

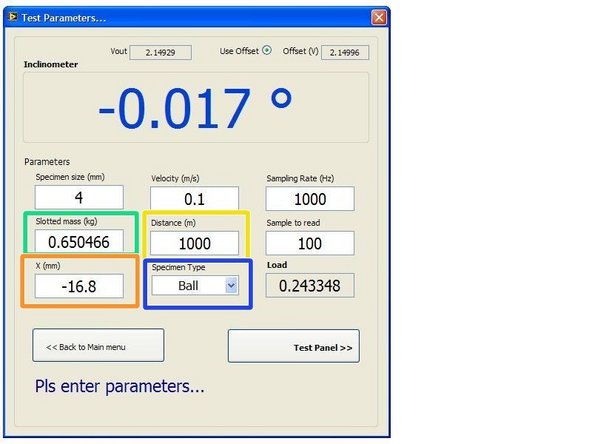
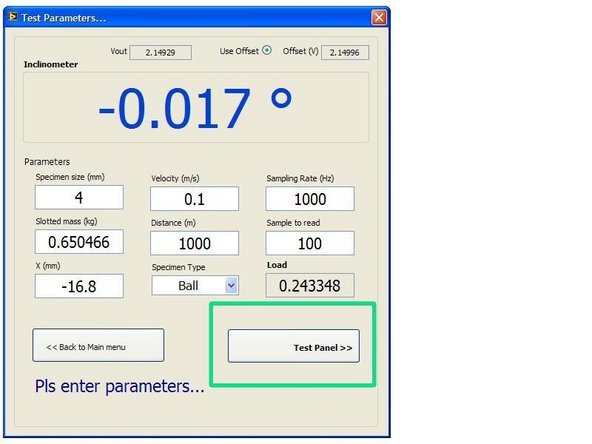
    • Input parameter in 'Production Test' user interface

  6. Fill in required experimental input parameters in 'Production Test' user interface. Especially (specific to experiments):
    • Fill in required experimental input parameters in 'Production Test' user interface. Especially (specific to experiments):

    • Slotted mass (in kg)

    • Distance

    • X (Displacement in mm)

    • Specimen type (Ball/Pin)

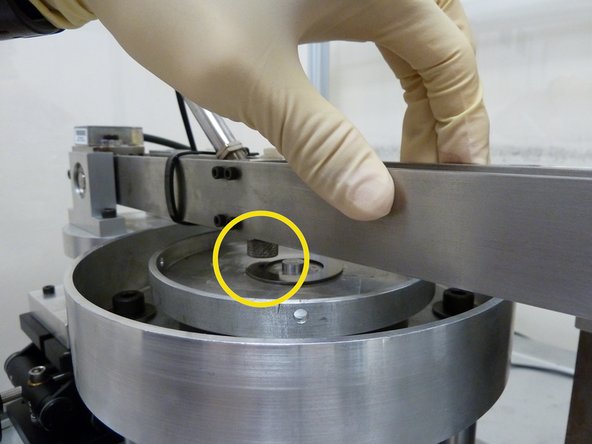
  7. Slowly place ball/pin specimen in contact with disc. Make sure ball specimen is placed right on top of disc Now, adjust the lab-jack knob, while taking note of the inclinometer reading (in deg) on the 'Production Test' page, to as close to 0 degree as possible Next, lock the lab-jack and place the cantilever back on the actuator step.
    • Slowly place ball/pin specimen in contact with disc. Make sure ball specimen is placed right on top of disc

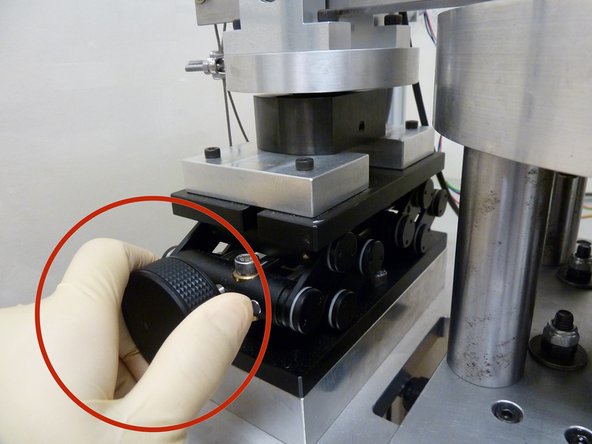
    • Now, adjust the lab-jack knob, while taking note of the inclinometer reading (in deg) on the 'Production Test' page, to as close to 0 degree as possible

    • Next, lock the lab-jack and place the cantilever back on the actuator step.

  8. Click on 'Test Panel' Ensure there is clearance between the cantilever and the load cell before clicking on 'Start'
    • Click on 'Test Panel'

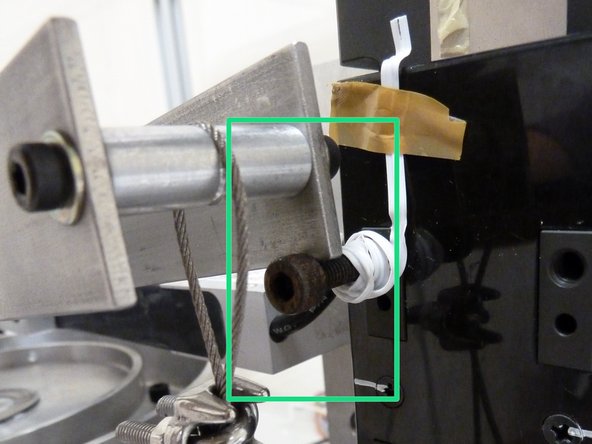
    • Ensure there is clearance between the cantilever and the load cell before clicking on 'Start'

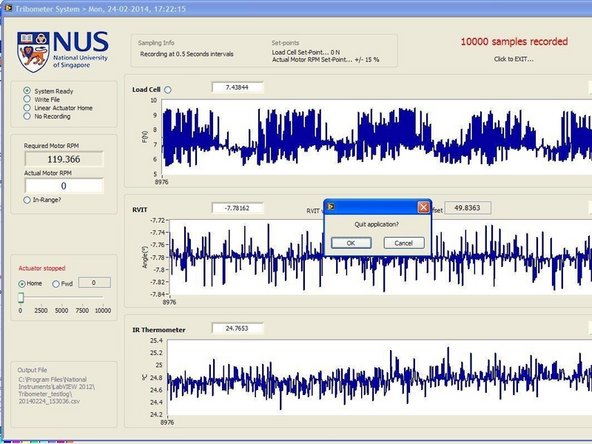
  9. Once the equipment runs the full distance as stated in 'Production Test' page, the actuator will move the cantilever away from the disc and the motor will subsequently stop running
    • Once the equipment runs the full distance as stated in 'Production Test' page, the actuator will move the cantilever away from the disc and the motor will subsequently stop running

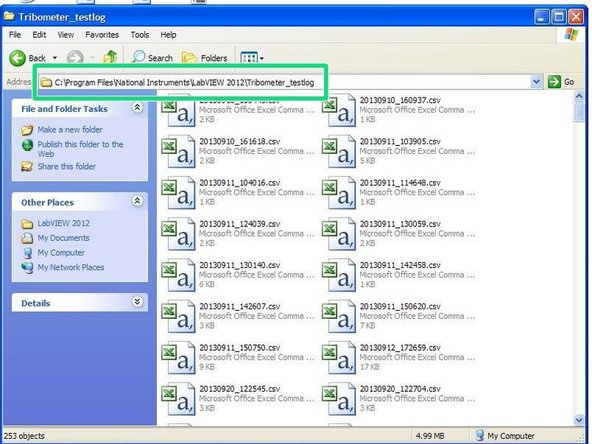
  10. Recorded data will be stored in the following location: C:\Program Files (x86)\National Instruments\LABVIEW 2012\Tribometer_testlog
    • Recorded data will be stored in the following location: C:\Program Files (x86)\National Instruments\LABVIEW 2012\Tribometer_testlog

Finish Line

Low Jun Hua

Member since: 01/23/2014

3,901 Reputation

37 Guides authored

0 Comments

Add Comment

View Statistics:

Past 24 Hours: 0

Past 7 Days: 0

Past 30 Days: 0

All Time: 35